Tuesday, February 9, 2010
Modeling and Special Effects before Computers
This HBO behind the scenes from 1982 has some awesome mustaches, hair styles, music, and retro visual composition technology. This piece features the creation of the iconic 80s HBO logo. Every aspect of this intro stems from something very physical. Also, notice the tertiary role computers played at the time; motion control cameras. As you watch, consider this: Would it be more or less expensive (in time, money, and people) to produce a comparable, modern version of this intro? Keep in mind the high level of polish demanded by such commercial art.
via CGChannel
Wednesday, February 3, 2010
Getting started scripting in GIMP
First, read the ScriptFu tutorial, starting with chapter 2 trough the end of chapter 3. Great, no problem.
Now, make sure you have gimp, I roll on a Mac so I had to go here. But, you probably already did that, good.
Next, go get yourself tons of examples, other scrips. Find some stuff that you might want to do, and work your way through their code. Modify it to do something new!
Here are some things to remember about Scheme:
Try some commands now. In gimp goto: Filters->Script-Fu->Console. This will open a command window that will allow you to test scripts. Now try this:
... hit enter. The window should show your command followed by some number in parens (1) for example. This is the image's ID and it's stored in the variable mynewimage. Now type:
... this should show a new image in gimp. We needed the (car mynewimage) because the image ID was actually inside a list, with just one element in it, the ID itself.
There is no need to memorize the functions that gimp provides. If you click on the "browse" button next to the text-entry-field in the console, it will produce a gimp function browser, so you can find the function you want AND its documentation.
Now, make sure you have gimp, I roll on a Mac so I had to go here. But, you probably already did that, good.
Next, go get yourself tons of examples, other scrips. Find some stuff that you might want to do, and work your way through their code. Modify it to do something new!
Here are some things to remember about Scheme:
- Parenthesis are important... use just the right amount, they mean something
- You put the operator first then the operands, all inside parens:
(+ a b) ; same as a+b
- Call a function using parens:
(gimp-image-new 512 512 0) ; creates a new image 512x512 in RGB mode (0)
- You can create variables two ways:
- (define x 1) ; use x where you like
- (let* ((x 1)) ...) ; x only exists within the (let* ... ) parens
- (define x 1) ; use x where you like
- Set the value of a variable:
(set! x 10) ; sets x=10, assuming x was defined earlier
- Create a function like this:
      (define (function-name parameters...)
         ... do stuff ...
         ; the last expression in a function is it's return value
      )
- Sometimes things are lists, especially function return values.
- Use car to get the first element of the list
(define x (car (gimp-image-new 512 512 0) ) ); puts the image id in x
- Use cdr go get the rest of the list
- Use car to get the first element of the list
- For-loops are a little strange. To do something 10 times it goes like this:
      (let loop ((i 0))           ; "loop" can be any name
        (if (not (= i 10))        ; test to see if you've already done it 10 times
          (begin                  ; start a block of instructions
             ... do something ... ; do your work here
             (loop (+ i 1))       ; go back to the top, increment i
                                  ;   ... i.e. call loop with i+1
          )
        )
      )
- Leave comments, anything after a ";" is a comment... English is also a nice language to use
(somefunction x y) ; this is a comment, should describe what you are doing
- Edit your script as a script! You need to do the following:
- Create a text file, on windows use Notepad for example.
- The filename convention is script-fu-yourscriptname
- Add to your script file the registration function. This will tell gimp what function to call. Below is an example registration, note that SF-BLAH stuff creates a user interface, so these items depend on the script, and are optional.
(script-fu-register
    "script-fu-myscript"                        ;func name
    "Some Script I wrote"                       ;menu label
    "This Script does stuff with things\
     to make widgets of ambiguous\
     utility."                                  ;description "\" means keep newline
    "Dr. Joe"                                   ;author
    "copyright 2010, JMK LLC Inc.               ;copyright notice
    "Stardate 2010.2"                           ;date created
    ""                                          ;image type that the script works on
    SF-STRING      "Text"          "Text Box"   ;a string variable
    SF-FONT        "Font"          "Charter"    ;a font variable
    SF-ADJUSTMENT  "Font size"     '(50 1 1000 1 10 0 1)
                                                ;a spin-button
    SF-COLOR       "Color"         '(0 0 0)     ;color variable
  )
  (script-fu-menu-register "script-fu-text-box" "/IFDM/MyScript")
- Now put the text file in the gimp script directory. This is in your "home" directory, look for a file ".gimp-2.2/scripts". Yes the file starts with a "."
- To make it show up, go to
->Script-Fu->Refresh-Scripts.
- Now you can run it by finding your script in the right menu. The location of the script depends on what you put for "script-fu-menu-register", the function right after the registration function.
- Of course, check the documentation and tutorials for more info
- Now you can run it by finding your script in the right menu. The location of the script depends on what you put for "script-fu-menu-register", the function right after the registration function.
- Create a text file, on windows use Notepad for example.
- There are many other nice things to learn about Scheme, but this will get us started...
Try some commands now. In gimp goto: Filters->Script-Fu->Console. This will open a command window that will allow you to test scripts. Now try this:
(define mynewimage (gimp-image-new 512 512 0))
... hit enter. The window should show your command followed by some number in parens (1) for example. This is the image's ID and it's stored in the variable mynewimage. Now type:
(gimp-display-new (car mynewimage))
... this should show a new image in gimp. We needed the (car mynewimage) because the image ID was actually inside a list, with just one element in it, the ID itself.
There is no need to memorize the functions that gimp provides. If you click on the "browse" button next to the text-entry-field in the console, it will produce a gimp function browser, so you can find the function you want AND its documentation.
Friday, January 22, 2010
Carpal Tunnel Syndrome Anyone?

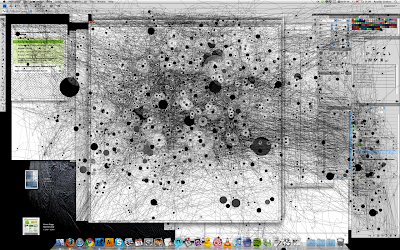
Carpal Tunnel Syndrome is a progressive, repetitive stress injury involving the nerves, ligaments, and muscles of the wrist. As a digital artist, it is your number one occupational hazard, like knee injuries in sports. The above image was generated by Anatoly Zenkov using a simple Java applet, which you can down load from the flickr comments and try yourself. Thousands of very precise movements and mouse clicks in just 3 hours! Do the math and decide for yourself; automation or physical therapy...
via Gizmodo
Wednesday, January 20, 2010
Avatar Special Features
Later in this 22 minute making-of piece, you get to see some of the character capture work done on the film. This is the modern and extreme example of "information transfer" that we talked about in class on tuesday.
Wednesday, June 3, 2009
Summer Drawing
I am still working on setting up a drawing session just for IFDM, but till that happens you will find several resources around town. Since my specific interest is figure drawing, that's where we will start. Fridays at the New Mexico Art League are all day drawing. There are two sessions (morning and afternoon), you can go to one or both. The Harwood also has drawing sessions in the evenings. There was (and still is to my knowledge) a Tuesday session 6-9pm in the old church building that is also figure drawing. Till I can get something going for us, please use these opportunities to get yourself going!
Monday, April 27, 2009
Swanky Retro-Future Diamond Heist
Here's a preview for a neat green-screen based action flic. All the effects were done in After Effects. Could we do better?
Via Boing Boing
Thursday, April 16, 2009
Extracting Images From Movies

We now have access (or soon will) to nice (as in clean) moving pictures thanks to our Panasonic AVCHD camera. Now, we need to hack those images! What we want is a simple utility to extract the frames from our .MTS files. It is important to realize that the .MTS file is really just an MPEG4, therefore if you are having problems loading it, you might just try a new file extension. After reviewing several tools I have found one that works just as we need, FFMPEG. It is a cross platform, command line tool that can convert nearly any movie format to any other, including a simple frame dump (what we want). Much thanks to Jeffery Bowles (an Advanced Graphics 413 superstar) for a nice, short description of getting it going on a mac:
MTS files are just mpeg4 files. The command line utility ffmpeg will let you extract the frames:
Building:
svn checkout svn://svn.ffmpeg.org/ffmpeg/trunk ffmpeg
cd ffmpeg
./configure
make && make install
Example usage with an HD camera
ffmpeg -i 00000.MTS -s hd1080 -f image2 waa-%03d.png
Note: the %03d bit above means each successive frame should be numbered using 3 digits. That is, the first frame will be waa-001.png the next will be waa-002.png and so on, up to our last frame waa-999.png.
Subscribe to:
Comments (Atom)